Quickstart Tutorial
This tutorial builds a small cube-like WulffPack nanoparticle, converts it into a voxel coordination-surface mask, samples adsorption sites from that mask, and runs a simple CO adsorption/desorption MCMD loop. The runnable example defaults to ORB-V3 on CPU with the conservative infinite-neighbor model. ASE EMT is kept as a fast fallback for testing the mechanics of the workflow.
The goal of this tutorial is to show how a voxel surface mask can drive trial move generation. The ORB-V3 settings used here are convenient for a compact demonstration, but the output should be treated as qualitative unless the calculator, chemical potential, sampling length, and adsorption model have been validated for the system being studied.
The complete script is available at
examples/mc/orb_v3_co_mcmd.py.
Install Tutorial Dependencies
AtomVoxelizer provides the grid machinery. This tutorial also uses ASE and WulffPack to build the nanoparticle:
pip install AtomVoxelizer ase wulffpack
For ORB-V3 scoring, install ORB and PyTorch in the environment you use for simulation. The example keeps that import optional because loading ORB can download weights and initialize accelerator libraries.
Build A Cube-Like WulffPack Nanoparticle
WulffPack creates a finite fcc particle from relative surface energies. The
natoms argument is a target; the final atom count can differ because the
particle is built from symmetry-compatible atomic shells.
from ase.build import bulk
from wulffpack import SingleCrystal

primitive = bulk("Pt", "fcc", a=3.92)
surface_energies = {(1, 0, 0): 1.0}
particle = SingleCrystal(surface_energies, primitive_structure=primitive, natoms=201)
atoms = particle.atoms
Using only the (100) facet creates a deliberately cube-like starting point
with roughly 50 Pt atoms by default. That keeps the ORB-V3 CPU example small
enough to run while still exposing several adsorption sites.
WulffPack returns a finite cluster without a periodic simulation cell. A voxel grid needs an invertible cell, so the example translates the cluster into a padded cubic cell:
import numpy as np

padding = 20.0
positions = atoms.positions
span = positions.max(axis=0) - positions.min(axis=0)
cell_length = span.max() + 2.0 * padding
atoms.positions = positions - positions.min(axis=0) + padding
atoms.set_cell(np.eye(3) * cell_length)
The padding should be large enough that desorbed or weakly bound CO molecules
do not immediately interact with the opposite side of the finite simulation
cell. The example defaults to 20.0 Angstrom.
Before adsorption/desorption begins, the example optimizes the clean nanoparticle. This optimized structure is then used to build the first voxel surface mask.
Build The Voxel Surface Mask
The coordination-surface mask is built with two sphere passes:
Add a larger sphere around every atom. This gives each voxel a count of how many atom-centered shells overlap it.
Set a smaller sphere around every atom back to zero. This removes atomic cores from the trial region.
import numpy as np
from ase.data import covalent_radii
from atomvoxelizer import VoxelGrid

radii = covalent_radii[atoms.numbers]
grid = VoxelGrid(atoms.cell.array, resolution=0.35, dtype=np.float32)
grid.add_spheres(atoms.positions, 1.4 * radii, value=1.0)
grid.set_spheres(atoms.positions, 1.1 * radii, value=0.0)
This is the same stencil-based operation described in Concepts. AtomVoxelizer visits the local sphere stencil around each atom instead of scanning every grid point against every atom.
Sample Trial Sites
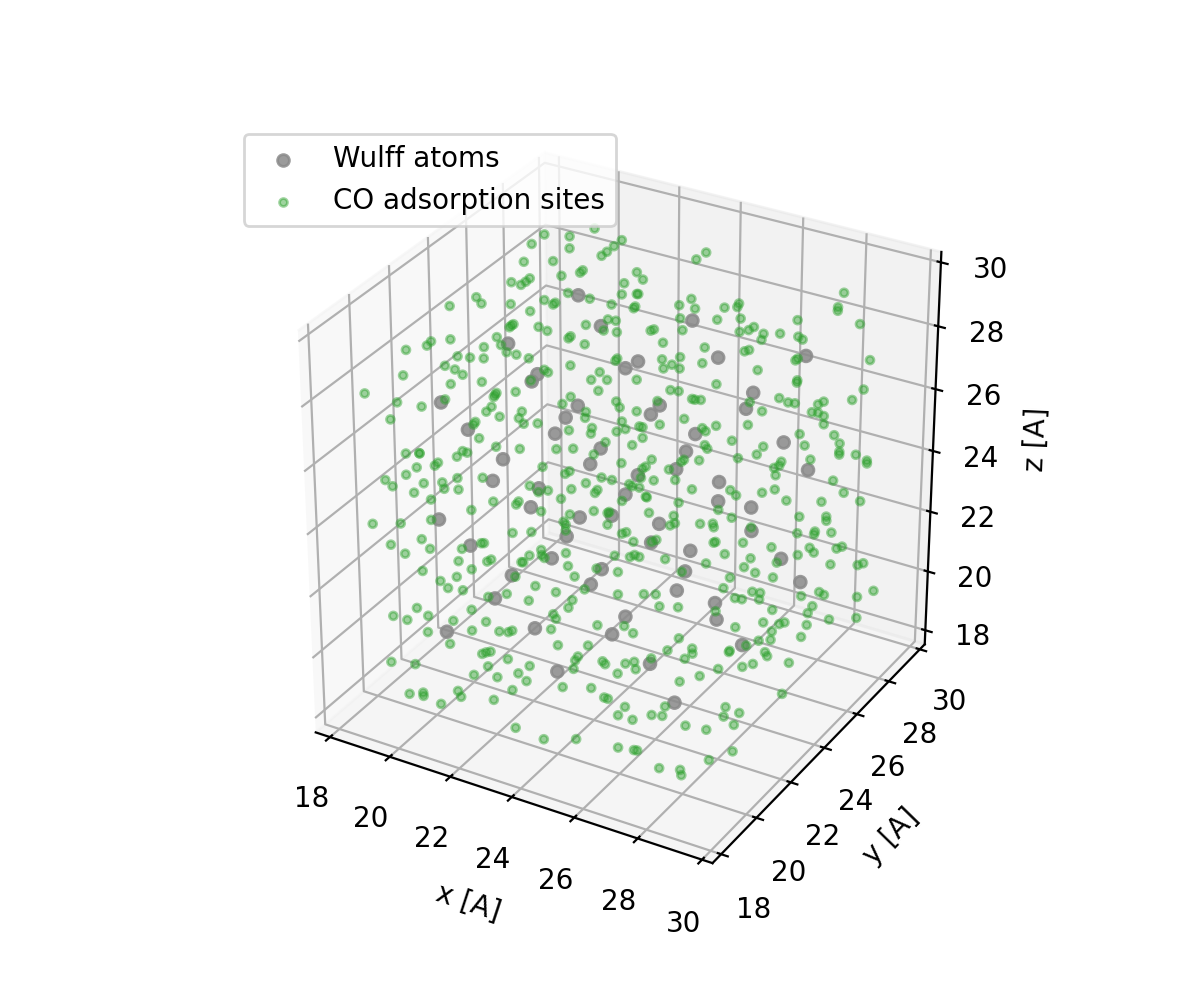
For a surface trial region, sample all non-core shell voxels. This includes atop, bridge, hollow, edge, and corner-like environments instead of restricting CO to one voxel-count range.
trial_sites = []
for position in grid.sample_voxels_in_range(0.5, 100.0, min_dist=0.6, seed=7):
    trial_sites.append(np.asarray(position))
    if len(trial_sites) >= 500:
        break
trial_sites = np.array(trial_sites)
Those positions are voxel centers in real space. In the MCMD example they are candidate carbon positions for CO adsorption. Occupied sites are assigned by the nearest adsorbed carbon within a short cutoff.
Minimal MCMD Loop
The example uses a simple grand-canonical score for CO:
E - mu_CO * N_CO. An adsorption trial adds one CO molecule with carbon at an
empty voxel-sampled surface site and oxygen pointing away from the nanoparticle
center. The newly inserted CO is optimized while the nanoparticle is fixed. A
desorption trial removes one occupied CO molecule. The trial is accepted with a
Metropolis criterion, then a short Langevin MD segment is run after every
decision. Rejected trials restore the previous accepted structure before the MD
segment. The voxel grid is rebuilt from the current nanoparticle geometry each
cycle, excluding CO atoms, so adsorption proposals follow nanoparticle motion.
Existing CO molecules block nearby proposed sites through --site-block-radius.
After each step, the CO chemical potential is nudged toward the requested
coverage target. Coverage is counted as N_CO / N_surface_atoms, where
surface atoms are nanoparticle atoms with coordination number below 11 by
default. Adsorption is capped by --max-coverage times this same surface
atom count, so the sampled voxel-site count controls where CO can be placed but
does not allow unbounded multilayer growth. The adaptive chemical potential is
also clamped by --mu-min and --mu-max to keep short tutorial runs from
overshooting badly.
import math

beta = 1.0 / (8.617333262145e-5 * temperature)
old_score = old_energy - mu_co * old_n_co
trial_score = trial_energy - mu_co * trial_n_co
delta = trial_score - old_score
accept = delta <= 0.0 or rng.random() < math.exp(-beta * delta)

if accept:
    atoms = trial
else:
    atoms = old_atoms

# The full example runs this after accepted and rejected MC decisions.
run_langevin_md(atoms, calculator, steps=50, temperature=temperature)
Run The Example
Run a short ORB-V3 CPU MCMD example with:
python examples/mc/orb_v3_co_mcmd.py --natoms 55 --steps 100 \
    --calculator orb-v3 --device cpu --orb-model-size inf \
    --temperature 500 --target-coverage 0.5 --md-steps 50 \
    --quickstart-figures
To regenerate the same documentation figures on a GPU, change --device cpu
to --device cuda.
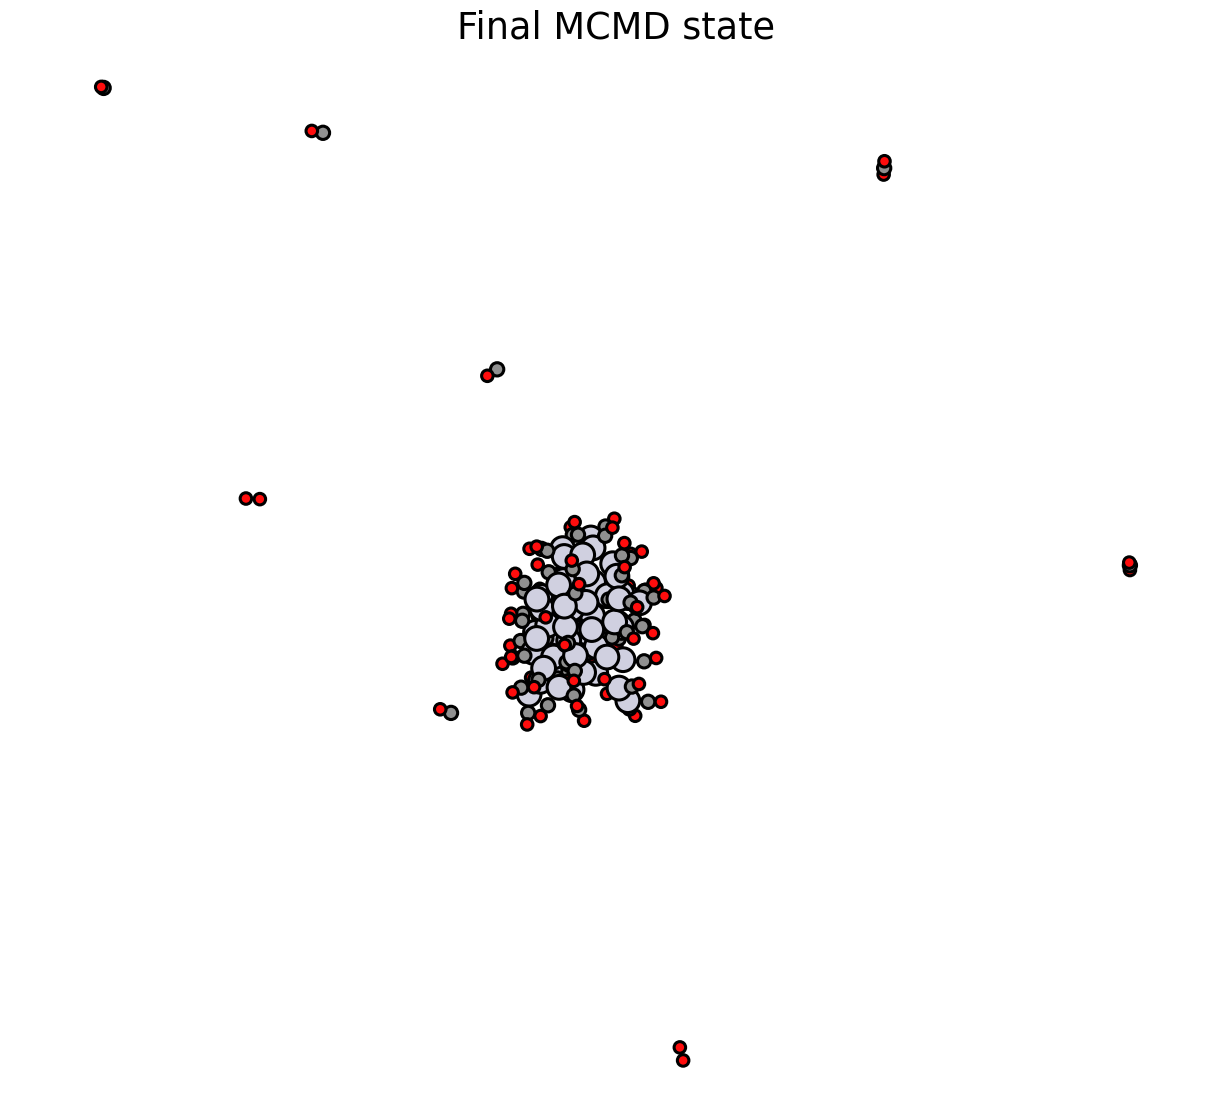
The figures shown below were generated from a longer GPU run so that adsorption, desorption, and MD propagation are all visible. They are intended to demonstrate the AtomVoxelizer workflow rather than to report a converged ORB-V3 prediction for CO/Pt adsorption. In particular, the general ORB-V3 model can place some CO in weakly bound or desorbed configurations during this compact tutorial run.
For a quick mechanics check without ORB, pass --calculator emt --steps 5
--md-steps 1. EMT is not intended to be a chemically meaningful CO/Pt model
here; it is just useful for checking the control flow.
The script prints the accepted move count, acceptance ratio, CO count, current coverage, current CO chemical potential, and substrate displacement. It also writes an ASE trajectory by default:
examples/mc/orb_v3_co_mcmd.traj
The image below shows the final nanoparticle state from the MCMD run, including CO molecules that remain near the nanoparticle and CO molecules that have moved into the padded finite-cell region.
Open it with ASE to inspect the MC path:
ase gui examples/mc/orb_v3_co_mcmd.traj
Each frame is the accepted structure after one MC decision and the following MD
segment. Rejected MC trials do not appear as trial geometries; the restored
accepted structure is propagated by MD and written instead. Pass
--trajectory "" to skip writing frames, or --trajectory path/to/file.traj
to choose a different output path.